Thursday, November 30, 2006

Defining the Thermal Boundary

The conditioned space should have a thermal boundary surrounding it, consisting of insulation and an air barrier. The conditioned space includes the building's heated or cooled areas. Heat transmission through the shell depends on the insulation's thermal resistance and the shell's surface area. Air leakage depends on building pressures and hole sizes - two factors determining the CFM-airflow between the building and outdoors.

Unconditioned spaces may include attics, crawl spaces, and attached garages. Some places, such as furnace and boiler rooms, are warmed by waste heat. These spaces are called unintentionally conditioned spaces. Unintentionally conditioned spaces and unconditioned spaces act as buffer zones between indoors and outdoors, slowing the building's heat flow. Defining the conditioned space means identifying the thermal boundary with its air barrier and insulation.

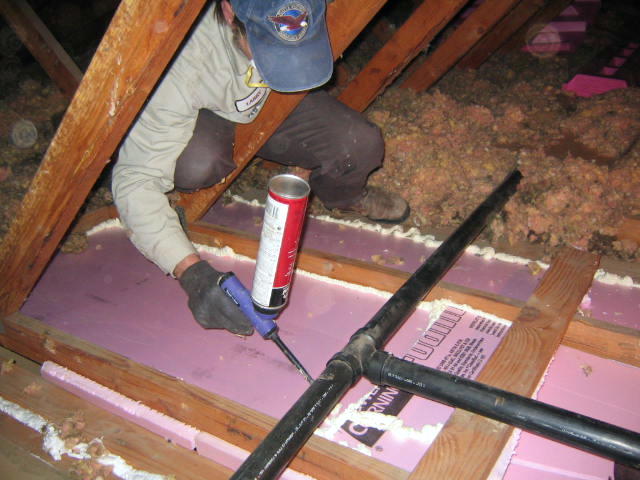
The air barrier and the insulation should be very close together. Air flowing against, around, or through the insulation is one of the most common energy wasters. Airflow carrying heat through the thermal boundary and around the insulation is called a thermal bypass. When wind-driven air flows through the insulation, reducing its thermal resistance, it is called wind washing.

Next Topic: Unoccoupied Basements & Crawl Spaces

Wednesday, November 29, 2006

Priorities for Energy Efficiency

Comprehensive evaluations of government and utility energy-conservation programs have yielded surprising results. Some of the most important findings are listed below:

* Storm doors, storm windows and window replacements are frequently not highly cost-effective because they are usually expensive. A very low savings on investment ratio.

* Thermal resistance of insulation is reduced by air flowing through and around the insulation. This is why air sealing is so important and MUST be done prior to insulating.

* Densely packed, blown insulation can reduce air leakage when installed in building cavities.

* Leaky ducts can be a major source of energy waste, both by leaking conditioned air and by creating pressures that increase air leakage through the building shell.

* The causes of winter heat loss and summer heat gain are fundamentally different and require different retrofit strategies.

The order of energy savings for cost effectiveness is:
1) Attic ceilings
2) Sidewalls
3) Furnace
4) Windows
5) Appliances

My recommendation is to walk prior to running, and address each unit and evaluate the savings and comfort prior to moving to the next unit.

Next Topic: Defining the Thermal Boundary

Tuesday, November 28, 2006

The Energy Picture Today

Interesting facts...

* The United States represents about 5% of the world's population, it controls about 8% of the world's energy resources, and it consumes 25% of the world's energy supplies.

* Energy is a principal commodity of our society, amounting to about 9% of the GNP.

* Total energy used equates to 65% electricity, 26% natural gas, 7% oil and propane and the remaining 2% is wood heat and other renewables.

* From 1976 to 1986, home-energy efficiency increased at an impressive rate, following the energy-price hikes of the mid-1970's. With the rise in energy prices today, energy-efficiency has once again thrust to the forefront.

* Energy efficiency focuses on maximizing the economic benefits of wise energy use. Energy conservation focuses on reducing non-renewable energy use...asking consumers for changes in behavior.

Next Topic: Priorities for Energy Efficiency

Monday, November 27, 2006

Dense-packing Insulation

There are many ways to insulate the sidewalls of a home, however only one way that the department of energy approves.

The old methods of insulating includes the two hole method and a one hole nozzle turn. Both of these methods, while providing better insulation than nothing - settles over a brief period of time. Of course the insulation settles at the highest (and weakest point) - allowing heat loss to occur.

Dense-packing costs more due to the labor and time involved. Once completed, the walls are extremely tight. When installing, the insulation tube is inserted completely in the wall's cavity. Insulation is then fed at 3.5# / CF. When the insulation slows, the tube is pulled slightly out and then thrust once again into the cavity, effectively squeezing out air which causes the settling. This process is repeated over and over per cavity until the cavity is full and tight.

This process is not only used for sidewalls, but slopes as well. The old school way of thinking stated that the slopes needed air in them to protect the roof. However, recent studies and procedures state that if the slopes are sealed at the bottom and there is insulation in the crown above the opening, the slopes can be dense-packed full - just like a wall. Since there is no air circulating, the roof sheeting is protected from the atmosphere changes.

Dense-packing is also used in floored attics to give the maximum R-value possible in a floored, non-conditioned space.

Lastly, there is only one way to truly insulate the walls of a brick home, and that is through the dense-pack method, interior drill. Some outfits will state that they can go through mortar joints on the outside, or through the basement going upwards. While these processes once again are better than nothing, they will fail when in comparison to the dense-pack method.

Next Topic: The Energy Picture Today

Sunday, November 26, 2006

Kneewall Attics Part 3 - Sidewalls, Slopes and Crown

Once the kneewall area has been air sealed, the next spot to attack is the crown - starting high and working downwards. If the crown area has its own hatch, great - blow from the hatch area second after slopes. Otherwise, the crown should be blown from the individual slopes.
Each slope cavity can have the blowing tube inserted and run to the crown. Based upon the crown's dimensions, divide the necessary bag count and install the appropriate amount of insulation. If the crown is small, blow until the area is packed.
Once the crown is complete, dense-pack the slopes full. Dense-packing will be covered in the next topic. Once the slope cavity is full, insert R11 vinyl backed fiberglass and foam tight.
Next, focus on the sidewalls. You can either Tyvek the wall and dense-pack, or insert R19 fiberglass and cover with Tyvek. Either way will work, with the dense-packing giving you the best insulation coverage. R19 fiberglass is faster, though. If you choose to use the dense-pack method, I recommend using plumber's straps to keep the Tyvek from bellying out.
Now that the crown, slopes and walls are complete, blow the flats to and R38 and exit the kneewall area.
The savings you will see from completing the kneewall attic spaces will be incredible!
Next Topic: Dense-packing

Saturday, November 25, 2006

Kneewall Attics Part 2 - Air Sealing

Once again, prior to insulating, air sealing needs to occur. Typically in a kneewall attic, you'll find the soil stack (AKA: Stink Stack), electrical penetrations and the main area to seal - open floor cavities running the entire length of the wall on two sides.
The soil stack is almost always open to air penetration. Builders cut a square opening and run a circular pipe through it. Of course, there's air leakage all around. A quick foam fix.
Due to the fact that the attic has been turned into a living space, the most overlooked air sealing area is the floor. The joists typically run perpendicular to the vertical long wall - and run from one kneewall attic under the living space and into the second kneewall attic. There are 2 common ways to stop the cold air from running from the kneewall attic underneath the floor. One is expensive (but works the best) and the next is the least expensive (but is labor intensive).
Expensive: Two part foam in a box. This foam has a resin and a catalyst that when combined create a quick drying, dense foam. Each floor cavity is sprayed in full where the wall intersects the floor joists - stopping air from going underneath the floor. You could easily go through $300 of foam. This way is very quick and easy.
Laborious (I like this word): Using an R11 vinyl backed fiberglass, you stuff each cavity with this fiberglass (vinyl facing outwards) and then foam around the edges to create a seal using one part foam (purchased from any home improvement store). Cost on this would be the fiberglass (around $40) and foam (10-15 cans - $100).
Once the floor under the living space has been sealed off, the flat area is ready for insulation.
Next Topic: Kneewall Attics Part 3 - Sidewalls, Slopes and Crown

Friday, November 24, 2006

Kneewall Attic Part One - Description

Kneewall attics are typically located in Cape Cod style homes. That is, the 3rd level where a full attic is usually found has been turned into a room with sloped ceiling. There are typically small attics on each side, running the length of the home. Two attics, two hatches, millions of possibilities for The Energy Guy to seal air leaks.

Inside the kneewall attic there are flats (the area over the ceiling below), the walls (which are the walls of the 3rd floor room), the slopes (part of the ceiling) and the crown. All 5 areas should be treated as individual components and addressed accordingly.

When the kneewall attics are corrected, there is a MAJOR energy savings and comfort achieved. Heat is kept where it is intended, the floors are warmer and the roofs last longer.
Next Topic: Kneewall Attics Part Two - Air Sealing

Thursday, November 23, 2006

HOLIDAY

Happy Thanksgiving to All!

Next topic tomorrow!

Wednesday, November 22, 2006

Cellulose Part 3 - Health and Safety

The final installment on Cellulose - Health and Safety - hopes to clarify some misconceptions in the world of insulation.

Cellulose fibers are classified as "nuisance dust," that is, dust which while possibly irritating and unpleasant, is not a health hazard. Cellulose insulation fire retardants are also well-characterized and regarded as nonhazardous. The toxicity of boric acid, a common fire retardant in cellulose insulation, is virtually identical to that of table salt. However, do not salt your french fries with Boric Acid. Just another helpful tip from The Energy Guy.

Official statistic: A 2001 health hazard evaluation report from the National Institute for Occupational Safety and Health (NIOSH) states that the highest concentration of respirable airborne fibers and particles released during cellulose insulation installation was five times lower than the federal OSHA exposure limit. NIOSH concluded that a common N95 dust mask provides adequate worker protection.

A recent installation job our Energy Guy Crew performed was on a home of a person with severe asthma. As a precaution, we asked this person to leave during the sidewall installation due to not knowing if there were any gaps in the interior walls that may leak dust. We also had the windows open (not a great practice during the frigid winter months.) At the end of the day the client returned and upon our arrival the next day this person stated that they had no ill effects. It's always better to be precautionary than to have one angry client.

Mold is the hot topic these days...following carbon monoxide, lead based paint, etc... With this being said, there is no documentation provided relating cellulose to mold - UNLESS the cellulose comes in contact with water (such as a roof leak). If this were to occur, the wet cellulose should be removed and fresh cellulose applied in its place.

Next Topic: Kneewall Attics Part One - Description

Tuesday, November 21, 2006

Cellulose Part 2 - Air Infiltration

Uncontrolled leakage of air through exterior walls and ceilings of homes is almost as important as R-Value in determining how much energy will be required to heat and cool a building. Infiltration of unconditioned air means that heating and cooling systems must expend more energy to compensate for the infiltration.

When dense-packing the walls (a later topic) of a home, "nooks and crannies" that leaked air in the past are sealed off from the exterior. The same holds true in an attic. Due to the fact that cellulose relies on density (bag count) versus height and air, less air penetration occurs through the ceiling joists and surrounding bypasses. Even if small amounts of air sealing are missed, cellulose will aid in compensating for the areas not covered.

Once again, The Energy Guy recommends cellulose for existing walls and attics - not only for the R-value, but for the air sealing capabilities.
Next Topic: Cellulose Part 3 - Health and Safety

Monday, November 20, 2006

This message is pre-empting The Energy Guy's daily writing.
The Energy Guy has asked me (The Graphics Guy) to respond to the various requests on how I placed the 'eguy' graphic at the top of this template.
Before I go into the details, let me preface this with 3 things you will need in order to accomplish what I did here:
1 - A working knowledge of html.
2 - A photo editing program that can save files as transparent gifs or jpgs.
I used Adobe ImageReady.
3 - An ftp or web server to post your edited copy of the graphic files.

And now the brief expalanation: (if you need more details feel free to email me at the 'Graphics Guy' link on the right)

I selected and saved the template I wanted to use for this blog.
For this one I chose Douglas Bowman's template No. 565.

In blog preview mode, I selected the graphic I wanted to change, right-clicked and downloaded the image "topleft.gif" to my computer.
Then I opened it in ImageReady and added my "eguy" graphic over the top of the original graphic.
I re-saved as a gif file and then uploaded to my personal website ftp.

Making note of the web URL on my site for this image, I then went into the "edit html" option under the blogger template tab, found the blogger site reference for "topleft.gif" and typed in my new URL for the image. (Click image at left for a larger view of the code)


Saved and viewed the blog and voila! new graphic!


The Energy Guy will return with his column tomorrow.

Sunday, November 19, 2006

Cellulose Part 1 - R-Value

In The Energy Guy's World, cellulose is by far the best insulation for the money - when installed correctly. The other insulation materials - fiberglass and foam - will be discussed in future writings. They too have good characteristics and uses. However, for now - it's Cellulose. The majority of the facts to follow come from the Cellulose Insulation Manufacturers Association. I have removed any bias facts that can be twisted to make the cellulose sound Superhuman.


Cellulose insulation is recycled paper products - recycled postconsumer waste. Fire retardants are applied during the manufacturing process to insure fire safety.

R-Value: The R-factor of cellulose is approximately 3.8 per inch and it does not vary significantly over a wide range of densities. Cellulose insulation maintains R-value under cold conditions. At an attic temperature of 20 degrees F below zero, the R-value of cellulose insulation is HIGHER than at 70 degrees above zero.

Next Topic: Cellulose Part 2 - Air Infiltration


Saturday, November 18, 2006

Drop Down Attic Stair Cases

For those of you who have drop down attic stair cases - they may be helpful - but they can be a large "energy waster." As opposed to the basic attic hatch, you have at minimum twice the size that is not insulated, and rarely do they seal properly.

When The Energy Guy runs into this type of attic opening, I quickly explain to the homeowner the need for a "Coffin Hatch." Yes, it sounds weird - however the hatch looks just like a coffin upon completion - sans dead body.

Due to the fact that the stairs fold compact on the hatch, they create a combined height that sticks up into the attic. Once the attic is shut, we measure the overall folded height and build a larger dam around the stairs - and secure it / caulk it. Then we create a new "hatch lid" that will sit inside of this weatherstripped dam, creating a secure cover. As the other hatch had R38 on it - so does this one. So...when you pull down the attic stairs, you look up and see another entry way - the new hatch. You lift this hatch up and out - and now you have access to the attic...and a good energy saver.

Note: I've been in 2 homes within the last month that had "slider stairs." This is where you pull down the hatch opening and there are straight, non-folding stairs that slide from the attic downwards. These type of hatches we recommend removing altogether and replacing with a push up hatch or a folding stair case. This is due to the fact that once the slider is up in the attic, not only do you have a low insulated hatch, you also have the area that the stairs slide to uninsulated.

Next Topic: Attic insulation Part 1 - Cellulose

Friday, November 17, 2006

The Push Up Attic Hatch


The push up attic hatch is an integral part of the thermal barrier. You can spend all the time you want air sealing and adding insulation - only to have a faulty attic hatch.

"What makes it faulty, Energy Guy?" you ask. Well, there are several issues that can exist that allow valuable energy to escape.

The Hatch is missing insulation - This is the most common. You've taken the time to insulate your attic properly, only to leave a glaring 2' x 2' area totally uninsulated. We typically want at least a 3/4" plywood hatch installed, covered with an R38 fiberglass batt - encapsulated in plastic. The plastic will ensure that the fiberglass stays in place. The R38 keeps the entire attic at the same level.

The Hatch is not weatherstripped - This item is typically not done, and when it is it's with the cheap felt strip that is more worthless than snow tires in Hawaii. We will install a "snow jamber" in the hatch opening so that when the hatch is closed, the seal is tight. This ensures that there is zero air leakage.

If you must build a dam for the hatch to drop down into, please make sure that it is made air tight as well - caulk carefully.

That's it for today - for those out there that are Ohio State fans - GO BUCKEYES.

Next Topic - Drop down attic stair cases.

Thursday, November 16, 2006

Air Sealing Part 2 - The Attic


Air sealing in the attic space is the number one location to seal off. Why? It is the last barrier to the outside that your home has - and heat chases cold - always has, always will. Some attics have such large bypasses needing sealed that by sealing them alone - energy (and money) will be saved.


I'm going to lightly touch on common areas in an attic that need sealed. I can go into greater depth on them (and probably will) in future writings. The areas commonly requiring sealing are (in no particular order) - electrical penetrations, kitchen soffit drops, stairway rakes, chimney chases, staircase rakes and plumbing bypasses.


Where The Energy Guy stated to be very careful so as not to make a mess in the basement, the polar opposite exists in the attic. Go to town. Seal away. If in doubt - seal it. Blower door readings done immediately after air sealing have been known to drop so much that insulation is a bonus - not the end all be all.


Foam board, foam and caulk are used in the attic. 2-part foam (again, another writing) can be used to seal off larger areas. We'll touch base on foams in another writing.


Once again - seal off the attic - you WILL save money.


COMMENT: I have added the links to two energy providers in Ohio. Feel free to submit your state's providers and I will add the links for all to share.


Next Topic: The Push Up Attic Hatch

Wednesday, November 15, 2006

Air Sealing Part 1 - The Basement

Good day everyone.

Air sealing has become the number one priority in Weatherization. Air exfiltration / infiltration effects heat / cold loss - and therefore your wallet. Finding leaks using the blower door first - then the trained eye - helps you seal off the home from the exterior. The exterior INCLUDES the attic.

You've seen people put plastic on the windows and shoot caulk in various spots. This is primitive air sealing - however it is a start.

Let's start in the basement. The number one exfiltration spot is in the band joist. Water lines, cable lines, electrical lines, etc. - are routinely NOT sealed off from the exterior, allowing heat and cold to escape. Foam in a can (purchased for under $10 a can from Home Depot and Lowe's) seals up these holes very easily. Please beware - if you get the foam on your clothes, it is extremely difficult to get out. I've been yelled at many a time by Mrs. Energy Guy for ruining clothing. It's kind of like The Energy Guy's kryptonite. Also, if you happen to get some on the floor, washing machine, etc. - do NOT attempt to wipe up immediately. Let it harden and scrape it up later. One last tip - if you start a can of foam, use it. It does not store once it has been started.

The next most common exfiltration / infiltration spot is the band joist / sill plate connection - especially in older homes. The area between the block and the wood can have gaps completely around the perimeter of the home. For these areas, simply silicon caulk around the edge where the block meets the wood.

Window frames (not the glass block windows) are sometimes extremely leaky. Once again, a bead of caulk can do the job.

How can you visually spot air leakage? Look for cobwebs. Cobwebs are a sign of a fresh air source - spiders spin these cobwebs near fresh air sources to attract bugs for lunch / dinner.

Crawl spaces have their own set of air issues - and we'll address them separately in a future Energy blog.

Please note: Mom and Pop hardware stores sell foam as well. I'm not endorsing either Home Depot or Lowe's - however they're recognizable and yes, I shop there as well. Without the cape...

Next Topic - Air Sealing Part 2 - The Attic

Tuesday, November 14, 2006

The Blower Door

The blower door is a tool that the general public has never heard about. It's a tool designed to test a home for "leakiness." Being The Energy Guy, I can use it; tell you how it works in layman's terms - but don't ask me "exactly" how it works. I'll leave that explanation to The Science and / or Math Guy (or Gal).

The blower door is an expandable frame that sets up in a major exterior door. A tarp is placed over it to block air movement, and a fan is inserted into a large hole. A gage is connected to 2 hoses - one to the outside (measuring the outside pressures) and one to the inside (measuring the home's environment.) With all this being said, the fan is turned up so that it is as close to and steady at 50 pascals. What's a pascal, you ask. See above - it's a unit of measurement that was named by The Science Guy. At this 50 pascal measurement, a reading is taken showing how many cubic feet per minute (CFM) are leaving the home (the fan is blowing outwards). In effect, it's a simulation of a 20 MPH wind against the shell of your home, forcing it to leak.

While this is occurring, you walk through the home in search of air leaks. A smoke puffer or eyes/feeling can be used to find the leaks. This is the first step to determining how leaky a home is. An example - a home registers 4500 CFM50 (cubic feet per minute at 50 pascals). This is approximately equivalent to a 4 1/2' X 4 1/2' window in your wall open year round. All homes require a certain amount of breathing - but this reading is very poor. Optional air sealing takes place at 2,750 CFM50. If you are at that target, you may or may not need to air seal. There's also building tightness limits - but we're straying wayyy off subject. There are various percentages that different levels should be reduced by - 50% on down. Our company just completed a home and the final blower door reading was 4,034 CFM50 - and we were happy. The original BDR was 8,164...

Proper air sealing should be done prior to insulating - for without air sealing, insulation is just a filter.

OK, The Energy Guy has a tendency to ramble - it must be getting late.

COMMENT REPLY: Of course the first question I received has nothing to do with weatherization. However, I will answer any question or respond to any comment I receive. Anonymous Guy (or Gal) wants to know where I got the graphic of The Energy Guy and how it was inserted in the template. Well, I have a good friend - The Graphics Guy, and he purchase the photo from a stock company (for $1, I think). The guy had hair, so Graphics Guy shaved him clean to better reflect me, The Energy Guy. Then he used his super powers to input it - meaning I have absolutely no clue how he did it, however he said it took a couple of hours to do the entire guy.

Next Topic: Air Sealing, Part 1 (and any replies to comments posted).

Monday, November 13, 2006

How The Energy Guy came into existence...

I had not planned on becoming The Energy Guy. I really hadn't planned on anything - short of enjoying life. Well, if there is one bit of advice I can deliver in this post, it's to make as many friends and contacts in life as possible. With that being said, I went from the finance industry into Weatherization. 15 years of finance - then poof - into the energy related field. Each contact I had led me to another and another. When I was "asked" to get into the weatherization field based on my customer service skills (and the skill is to treat everyone as if they are your only customer) - I was intrigued. I did a little research and asked a lot of questions.

I agreed to take the next step - and that was to audit another professional in the industry. Up into an attic I went. It was a puzzle - and there are no two puzzles alike. Yep, I'm hooked. Off to classes at COAD in Athens, Ohio. Yep, still hooked. I started up a company within a company - slow and steady growth, relying on Government work for the basic income, retail residential for the "profit."

What is so intriguing about Weatherization? It works. Period. It's one of the only fields that you can say, with 100% accuracy - I WILL save you money if you let me weatherize your home. I'm helping someone. I'm helping the environment. I'm providing stable employment for the people that work with me. I'm making a little money along the way. Yep - being The Energy Guy has all of these rewards.

Until I receive a question from you, I'll be providing the topics. If you know what's good for you...you'll write soon - unless you enjoy a good ramble.

Next topic: The Blower Door